


1
2
3
4
5
6
7
8
9
10
11
12

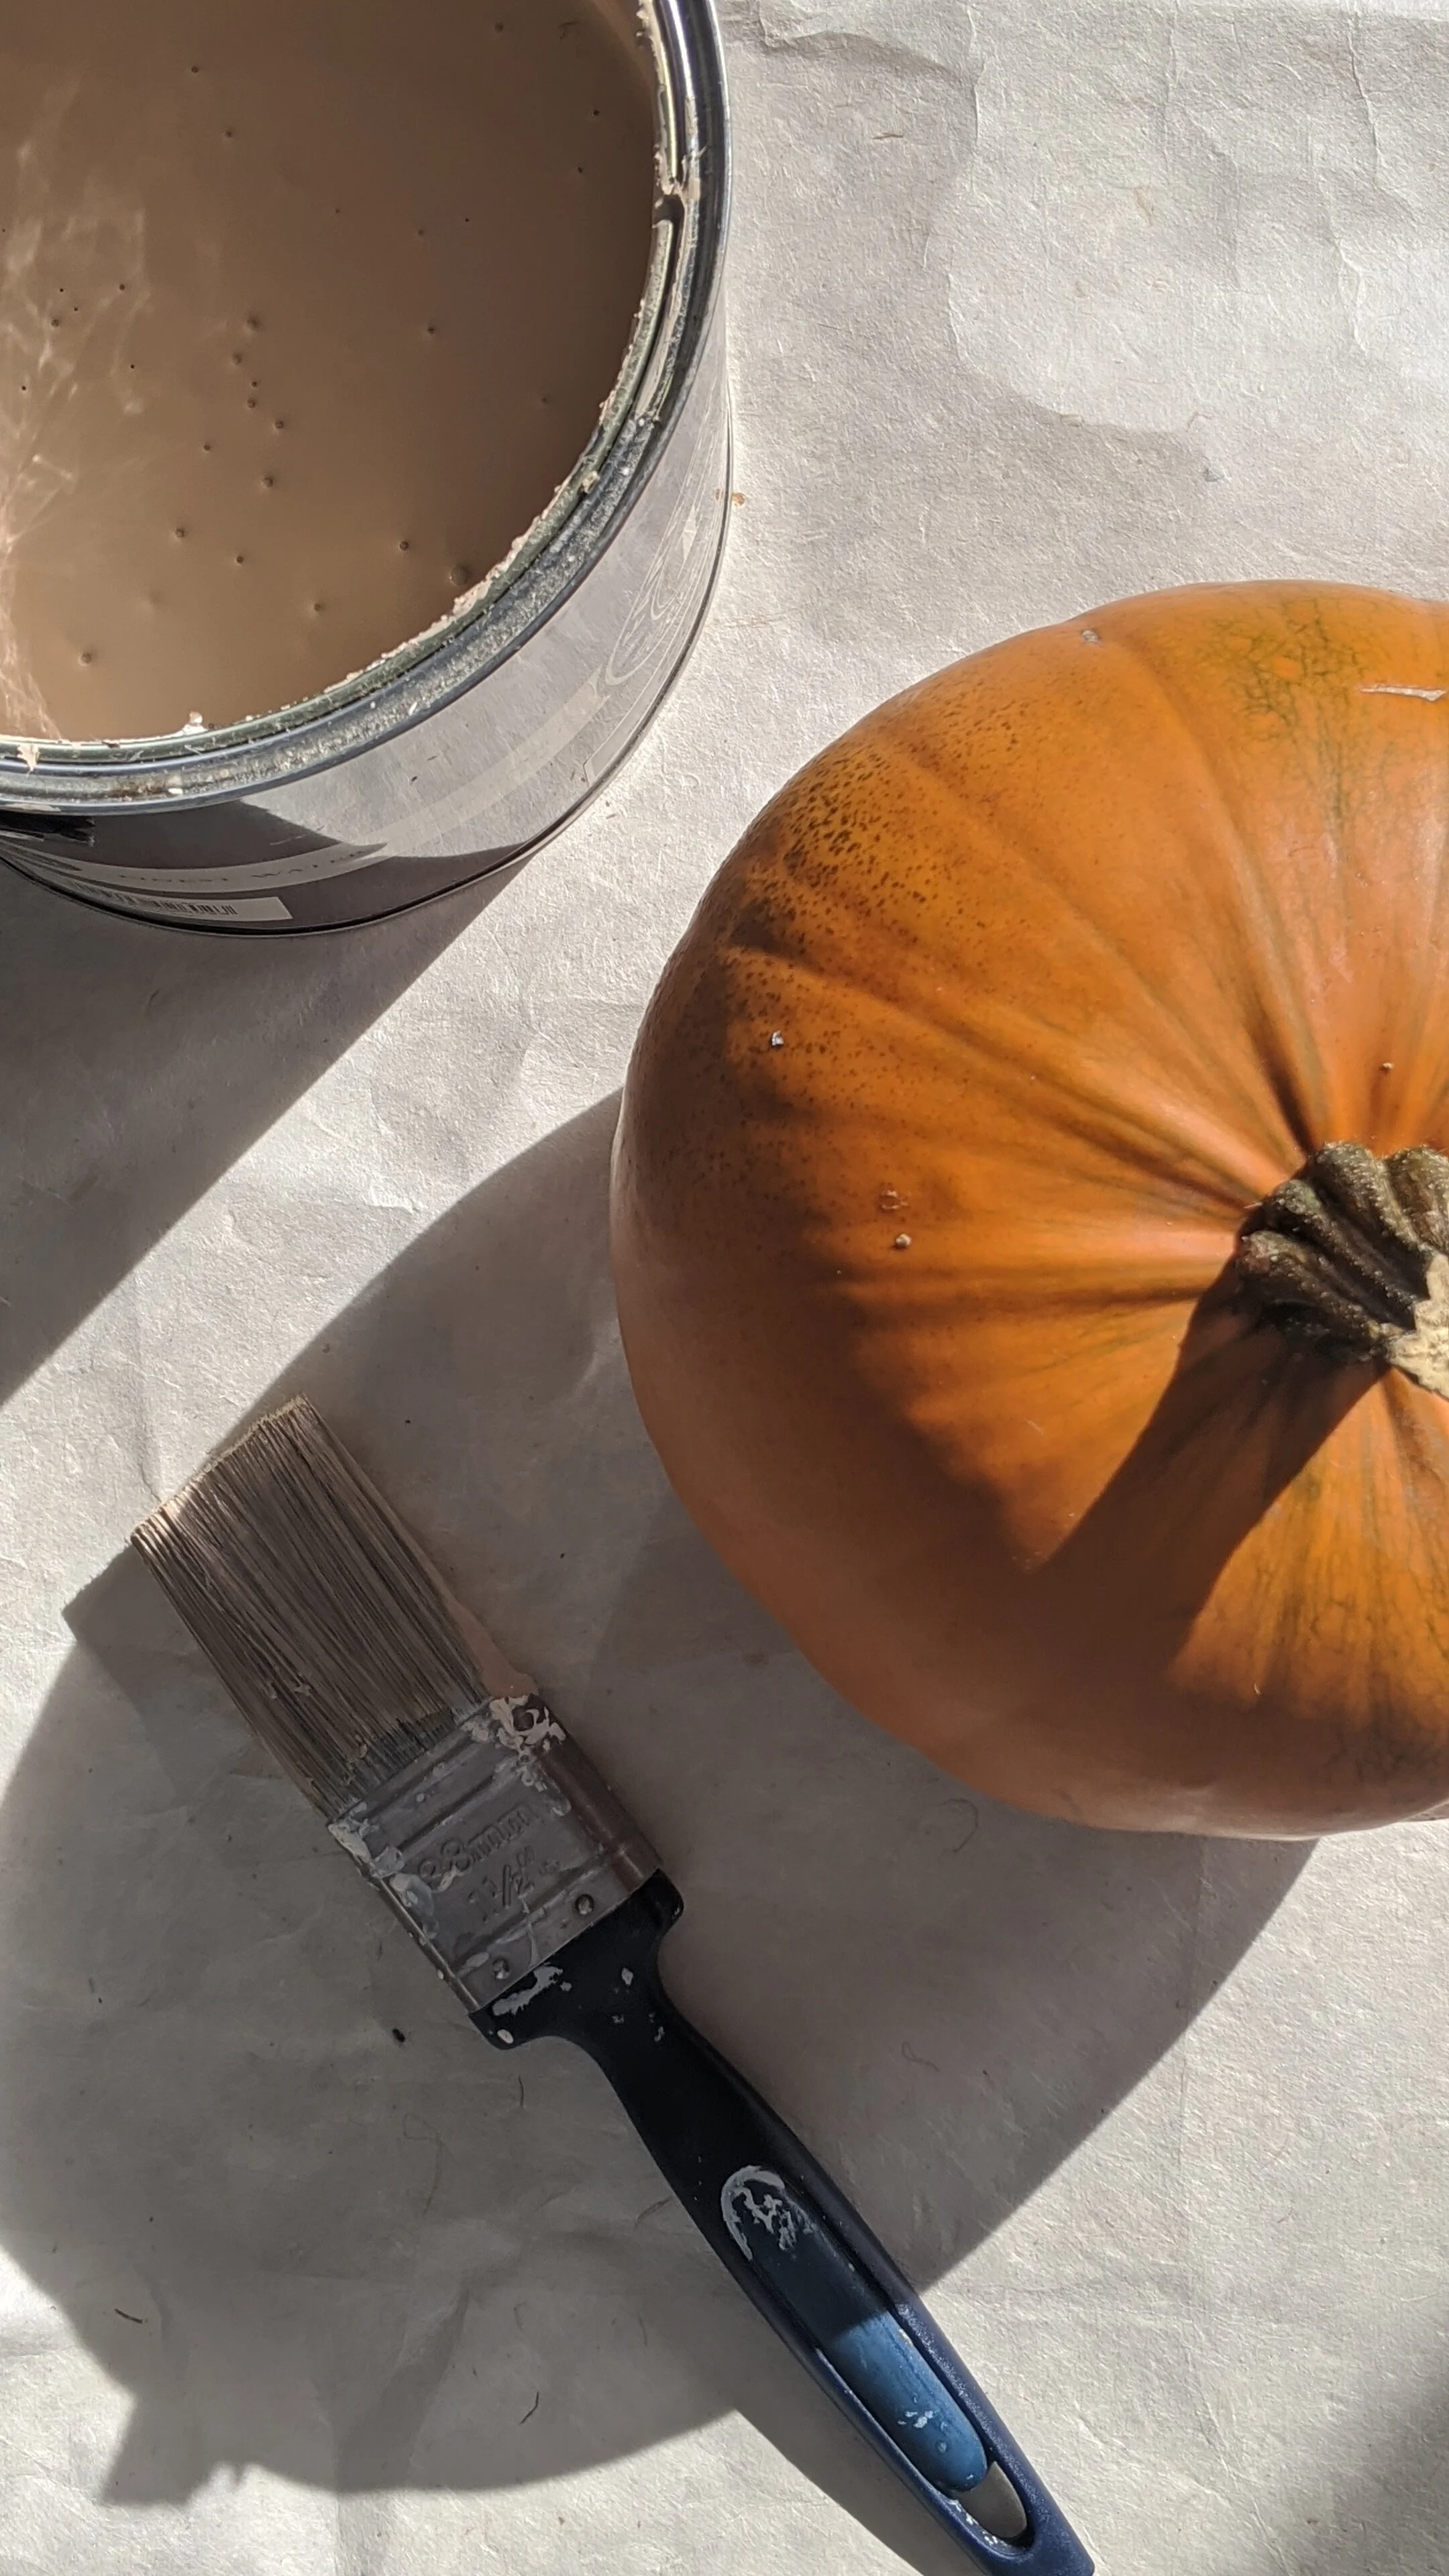
Go find a nice pumpkin. There are some pumpkin patches around if you fancy a fun day out, or you can just pick one up with your shopping like I did. Give it a wee wash so any dirt doesn’t get caught up in the paint.
Choose your fave paint colour and brush of choice. I had some old paint and paintbrushes in the cupboard from decorating our hall which worked perfectly, maybe you do too? If not some acrylic paint would be perfect. I used an “estate emulsion” which has a chalky matt finish - would definitely recommend this over a gloss paint.
Get painting! Just leave the bottom out for now or it’ll stick to the surface.
First coat done! Some brush strokes are visible when wet but it dried completely matt and flat. Check back in half an hour to hour to see if it’s dry
Second coat to get it really full coverage
Once the second coat is dry flip the pumpkin onto its side and get the bottom painted! I only did one coat as it’ll mainly just be sitting on a surface
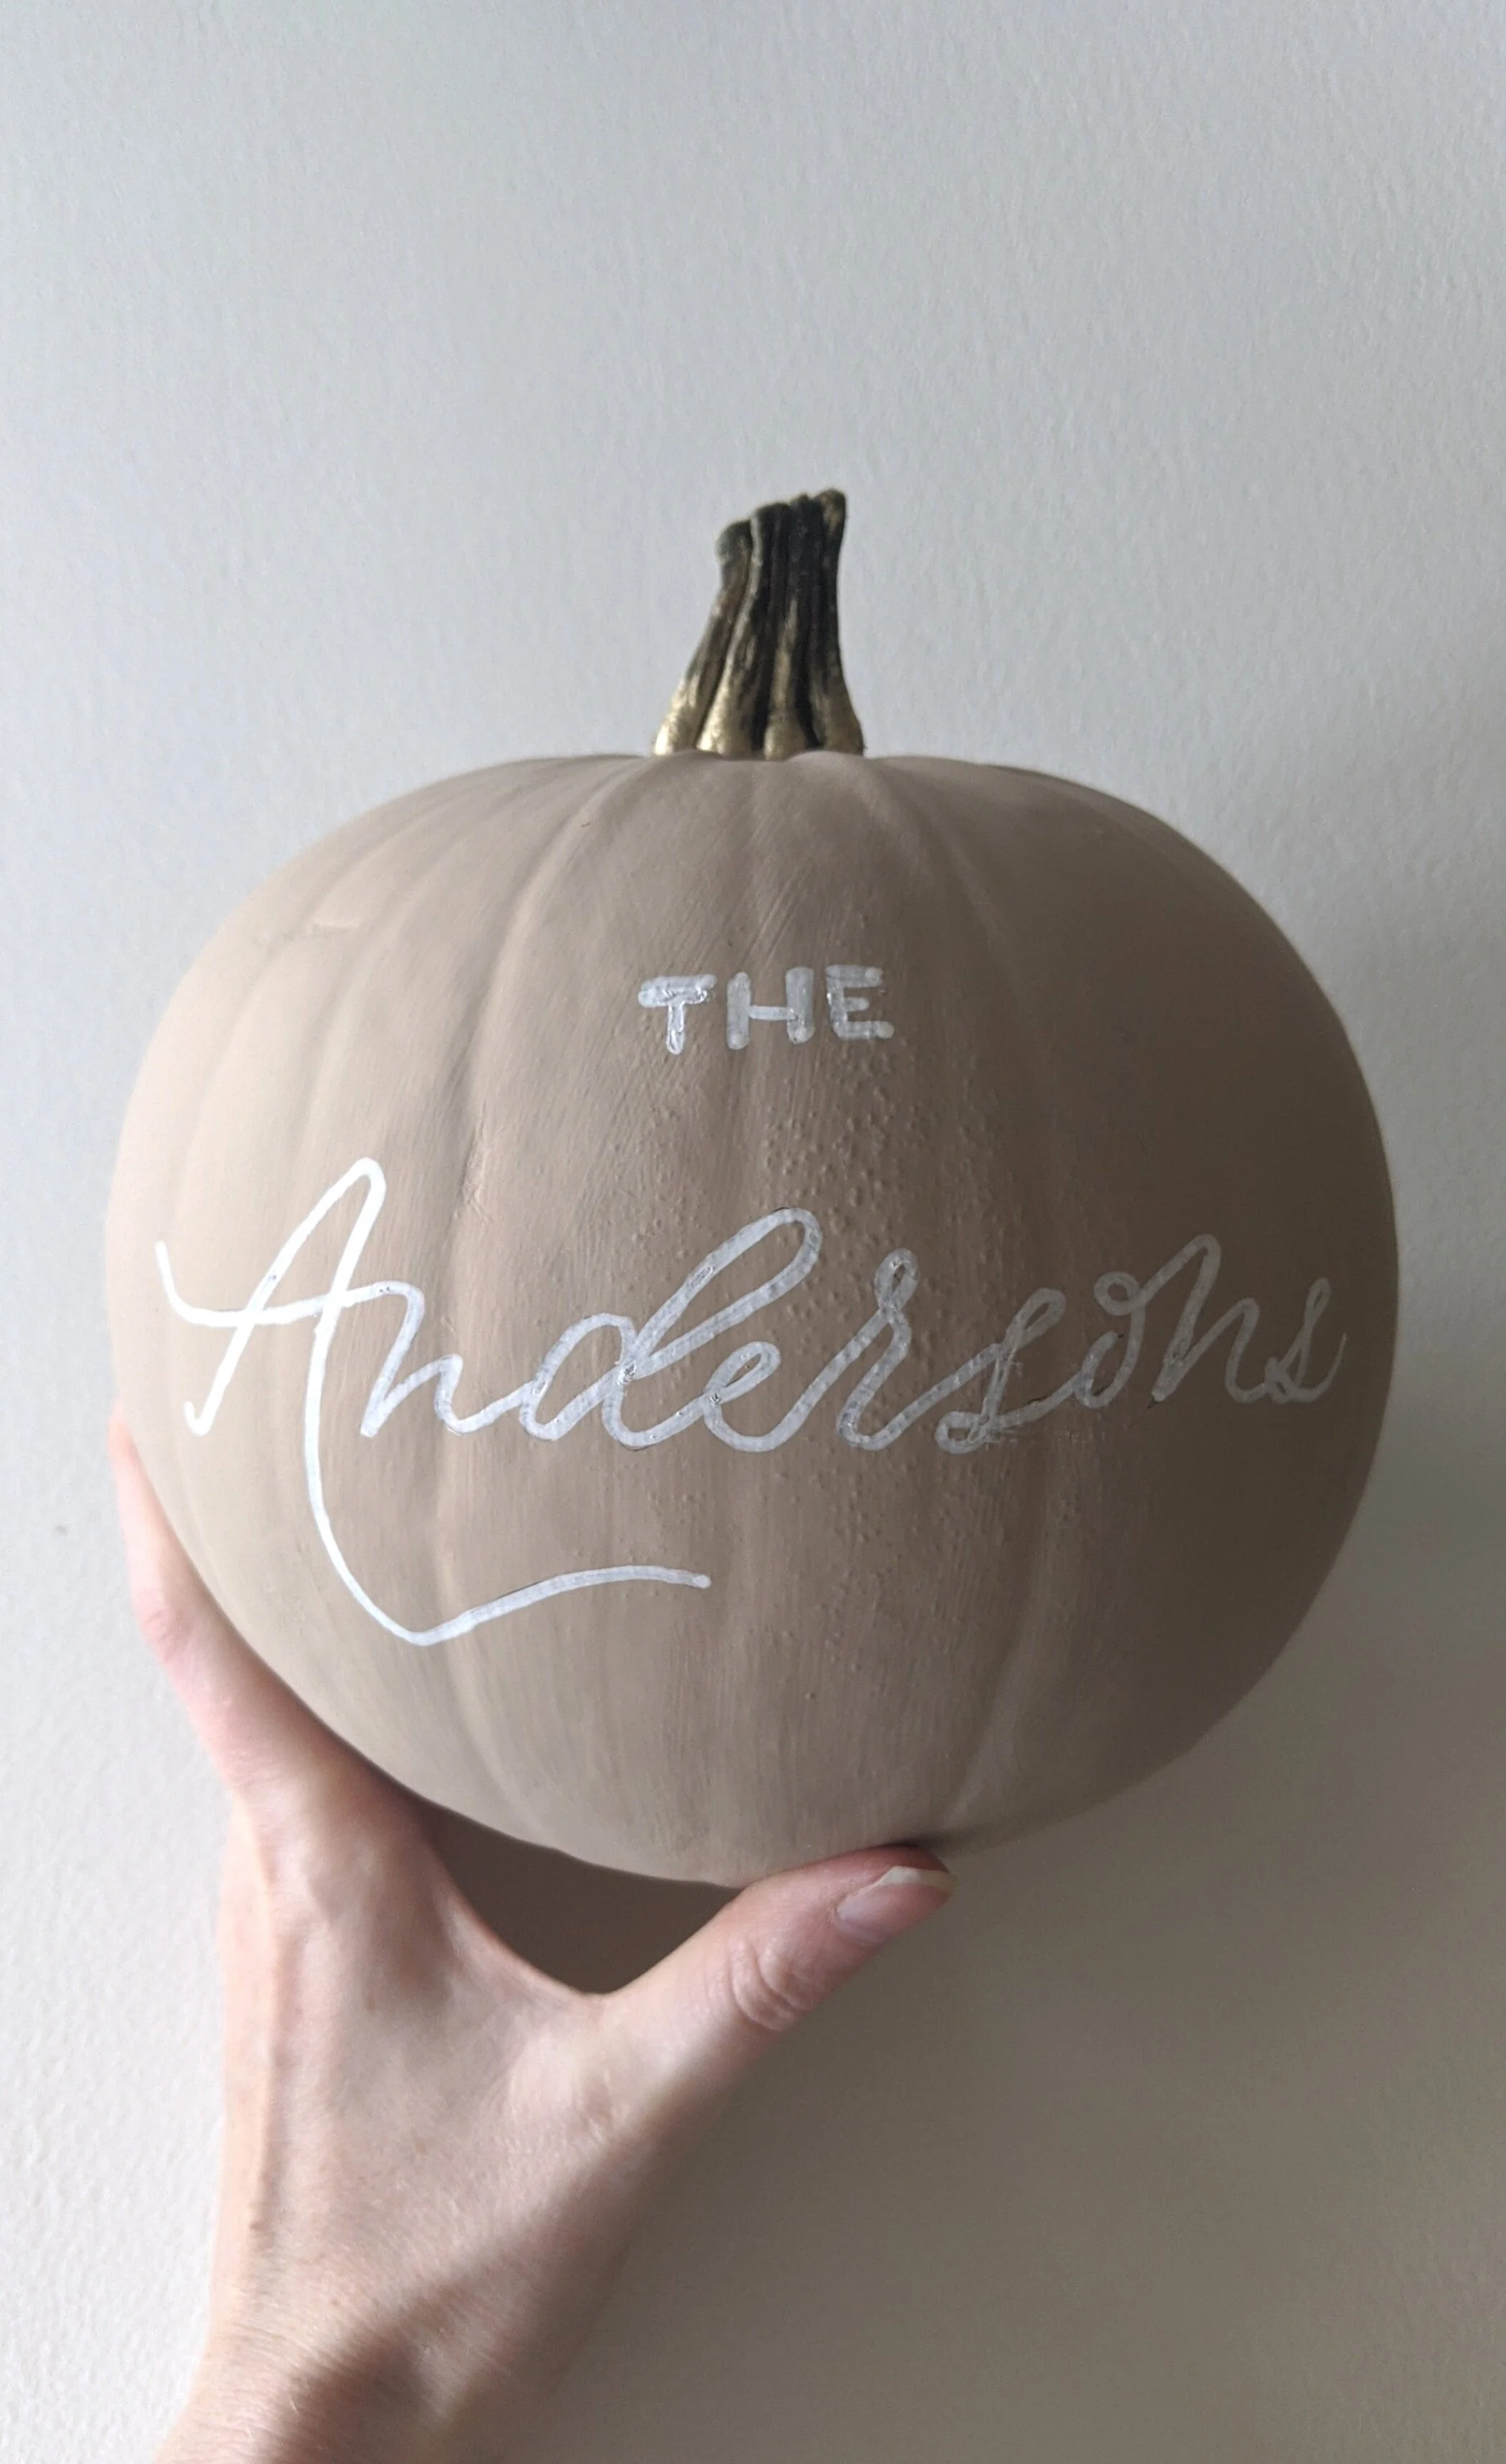
Got a lil paint on the stalk so let’s colour it gold and make it a feature
You can colour as much of the stalk as you like, I went for along the bottom edge and up higher in the ridges so it fades nicely
I used the Pebeo 4Artist Gold Marker in the 4mm size, I had 4 or 5 other gold markers and this definitely came up the most metallic
PERSONALISING! If you’re brave enough you can go straight in with a pen, if not maybe practise your design a little on paper first, then pencil it onto the pumpkin. You can always paint over mistakes so don’t need to be too precious.
PEN TIME. I used the trusty Posca paint marker as it’s what I had, but any white paint marker should be ok. It might need a couple of coats just to get good coverage. This pen is water resistant so will survive if your pumpkin lives on your doorstep!
You can leave it monoline like this which is beaut, or can go a step further and thicken up all the down strokes so it looks more like calligraphy. - like the animation below
Let’s collab on something! Tell me what project you have in mind and we can start sharing exciting ideas